All Hearing Aid Tests You Must Know Before Choosing One

Written by- Dr. S.M. Tarique Najeeb

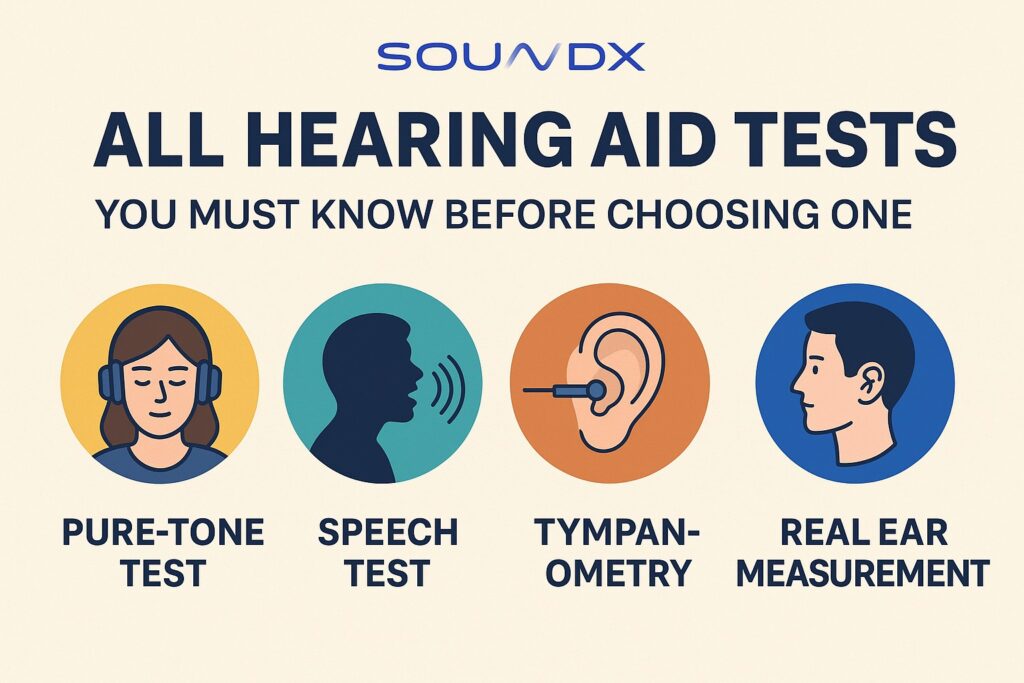
There are 7 main types of hearing tests that audiologists use, depending on your age and symptoms. These tests help them figure out exactly how well your ears are working and what kind of help you might need. Knowing about these tests beforehand makes the process easier and less scary. By understanding what to expect, you can confidently book your hearing check and take the first step toward better hearing.

Over 1.5 billion people worldwide experience some form of hearing loss, with 430 million of them requiring rehabilitation for disabling hearing loss, World Health Organization. By 2050, it’s projected that over 700 million people will have disabling hearing loss from the World Health Organization. Early detection through hearing tests can help prevent further issues and improve quality of life.

7 Types of Hearing Tests You Need to Know

1) Audiometry:

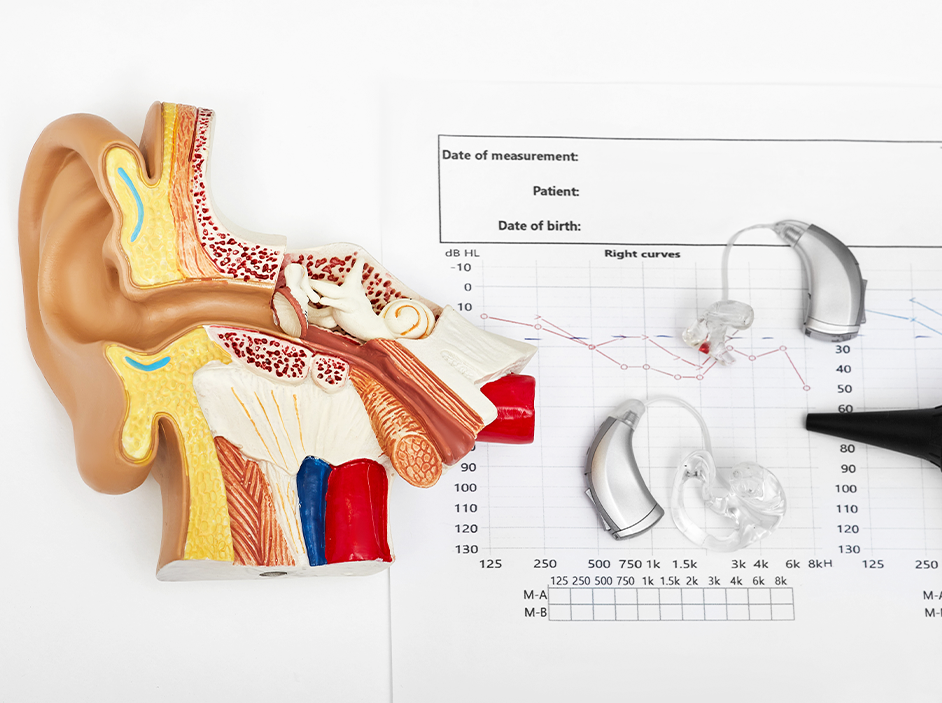
This test checks how well you hear different sounds, from very low to very high pitches. You wear headphones, and every time you hear a beep, you raise your hand or press a button. The results are shown on a graph called an audiogram, which helps the audiologist see what sounds you can and cannot hear.

2) Speech Testing:

This test checks how well you understand words and speech at different volumes. Sometimes it’s done in a quiet room, and sometimes in a noisy one to mimic real life. The results help the audiologist decide if you need a hearing aid or another device.

3) Tympanometry:

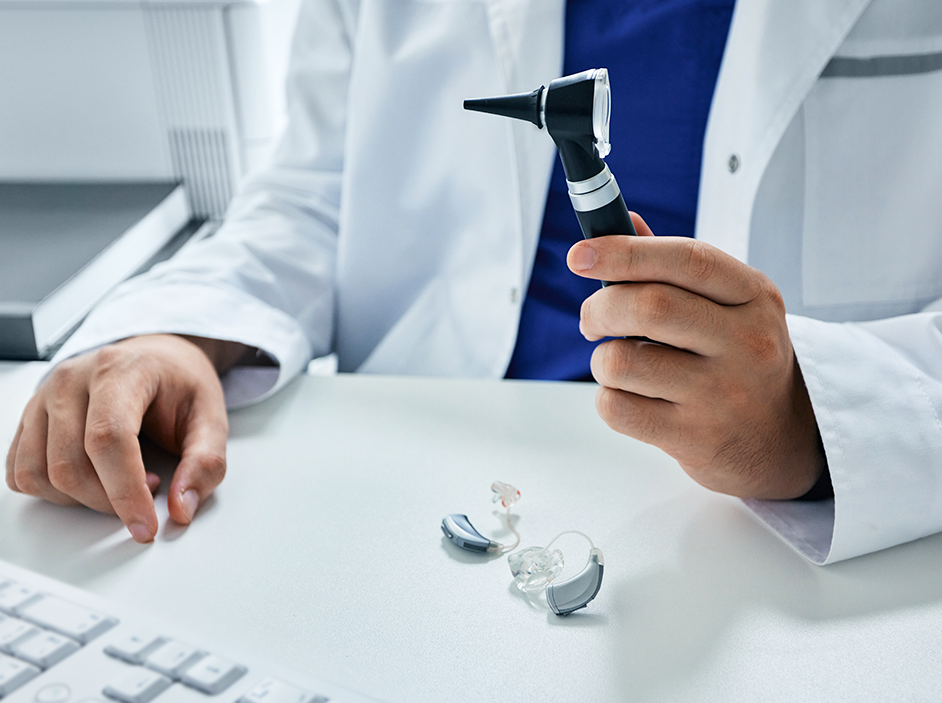
This test looks at how your eardrum moves. It can find fluid, wax buildup, or damage in your middle ear. A small probe goes into your ear, and different sounds and pressures are tested. The results are shown on a graph called a tympanogram.

4) Acoustic Reflex Measures and Static Acoustic Measures:

This test checks how well the muscles in your ear work, especially in children under 5. Loud sounds are played, and the audiologist sees if your ear responds. If the ear needs louder sounds to react, it may show hearing damage.

5) Electrocochleography (ECOG):

ECOG measures how your inner ear (cochlea) reacts to sound. Earphones play sounds, and electrodes on your forehead pick up responses. This test can detect certain conditions like Meniere’s disease.

6) Auditory Brainstem Response (ABR):

This test checks how fast sounds travel from your ear to your brain. It’s often done on babies or young kids. Earphones and small electrodes are placed near the ears and forehead. Sometimes kids need to sleep or get light sedation.

7) Otoacoustic Emissions (OAEs):

OAEs check if your inner ear hair cells are working. A small probe in your ear measures tiny sounds your ear makes when it hears noise. If your ear doesn’t make these sounds, it could mean hearing loss.

Hearing Loss Tests Compared: Find the Right One Fast

Test NameWhat It ChecksHow It WorksBest ForWhat It Detects
AudiometryHow well you hear different sound pitches (low to high)Wear headphones and raise hand or press button when you hear beepsAll agesHearing loss at different frequencies; results shown on audiogram
Speech TestingHow well you understand words and speech at different volumesListen to words in quiet and noisy environmentsPeople with communication difficultiesSpeech comprehension issues; helps decide if hearing aid is needed
TympanometryHow your eardrum movesSmall probe in ear tests eardrum with sounds and pressure changesMiddle ear problemsFluid, earwax buildup, or eardrum damage; results shown on tympanogram
Acoustic Reflex & Static Acoustic MeasuresHow well ear muscles work when exposed to loud soundsLoud sounds played to check if ear muscles respond properlyChildren under 5 years oldHearing damage if ear needs louder sounds to react
Electrocochleography (ECOG)How inner ear (cochlea) reacts to soundEarphones play sounds while electrodes on forehead measure responsesInner ear disordersConditions like Meniere’s disease
Auditory Brainstem Response (ABR)How fast sounds travel from ear to brainEarphones and electrodes placed near ears and forehead; may require sleep or light sedationBabies and young childrenBrain’s response to sound; nerve pathway issues
Otoacoustic Emissions (OAEs)If inner ear hair cells are working properlySmall probe in ear measures tiny sounds your ear makes when hearing noiseNewborn screening and early detectionInner ear damage; no sound emission means possible hearing loss

Final Notes:

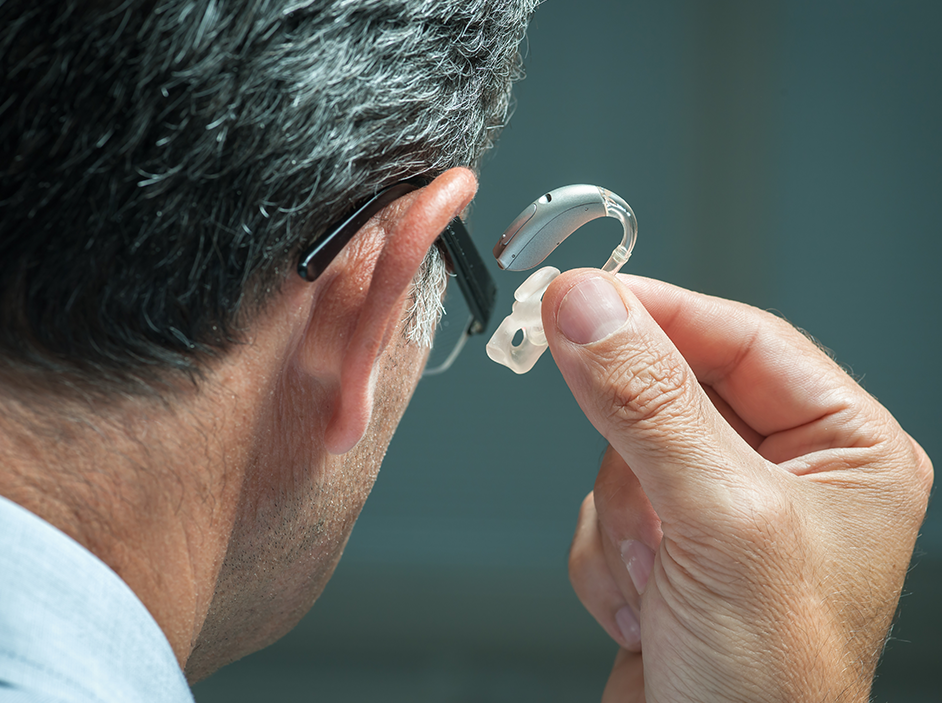
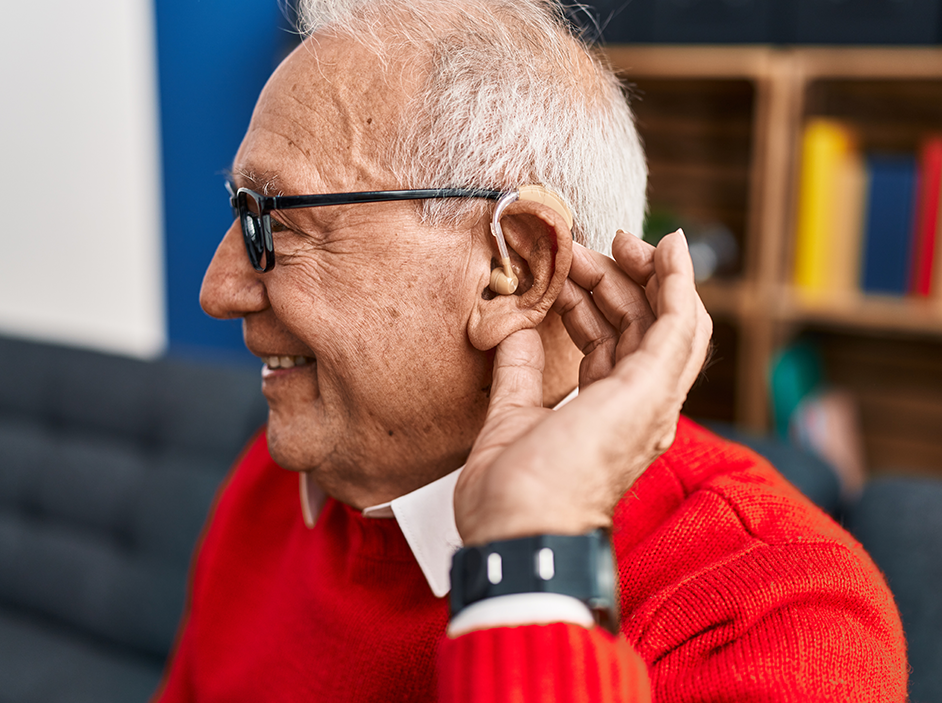
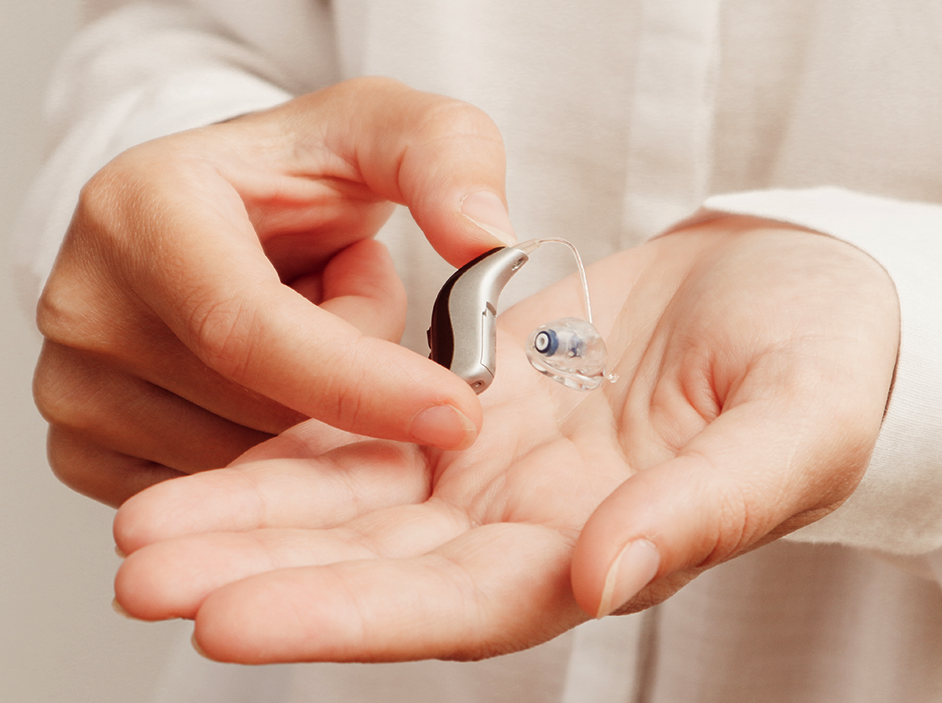
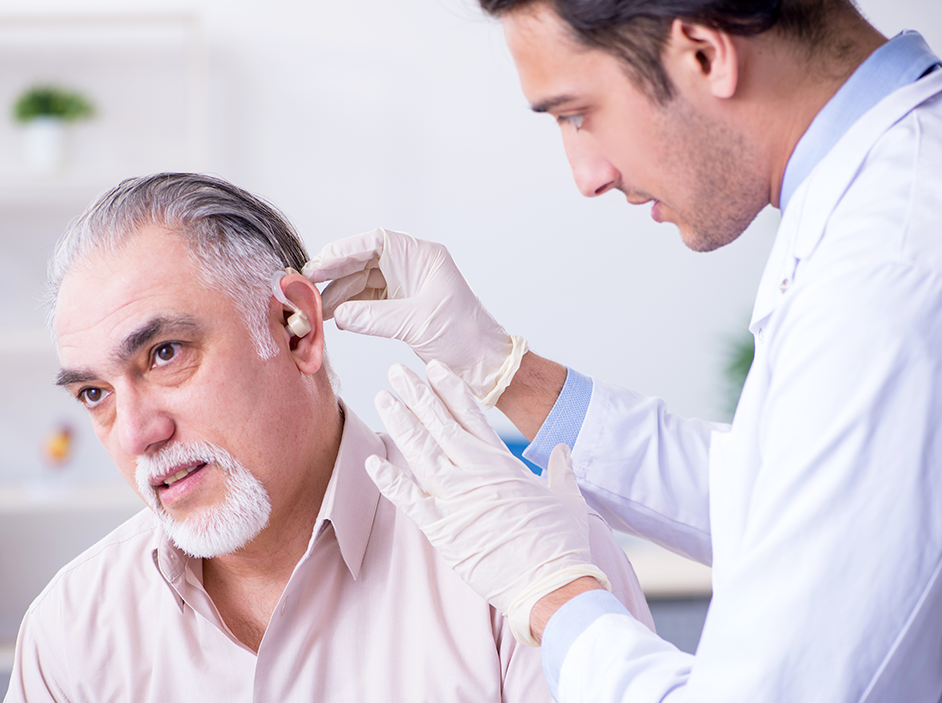
Hearing tests are safe and usually need no special preparation. Most people take two or more tests to get an accurate result. After the tests, your audiologist will suggest the best treatment, like therapy, a hearing aid, or sometimes surgery.

If you want a clear and comfortable hearing test experience, visit SoundX. Their experts use modern tools to check your hearing and help you find the right hearing aid for your needs. With SoundX, hearing better becomes simple, easy, and worry-free!

FAQ

1. What is an audiometry test?
Audiometry checks how well you hear different sounds, from low to high. You wear headphones and raise your hand or press a button when you hear beeps.

2. What does a speech test do?
A speech test shows how well you understand words in quiet or noisy places. It helps find speech comprehension problems and if you might need a hearing aid.

3. What is tympanometry for?
Tympanometry checks how your eardrum moves. A small probe in your ear tests for fluid, wax buildup, or eardrum problems.

4. What are acoustic reflex tests?
These tests see if your ear muscles respond correctly to loud sounds. They are usually done for young children under 5.

5. What is Electrocochleography (ECOG)?
ECOG checks how your inner ear (cochlea) reacts to sound. Electrodes on your head measure responses to sounds in your ears.

6. What does an Auditory Brainstem Response (ABR) test show?
ABR shows how fast sound travels from your ear to your brain. It’s mostly for babies and young kids, and sometimes they may need to sleep during the test.

7. What are Otoacoustic Emissions (OAEs)?
OAEs test if your inner ear hair cells are working properly. A small probe in the ear measures tiny sounds your ear makes when hearing noise.

8. Do I need to prepare for a hearing test?
No special preparation is needed. Most people do two or more tests to get accurate results. Your audiologist will then suggest the best treatment.

Dr S.M. Tarique Audiologist says:

Your hearing can reveal what’s happening inside your body. Your ears hear more than sound; they reflect your body’s overall health.

Visit Profile- Dr. S.M. Tarique Najeeb

Make Your New Hearing Aids Comfortable in Just a Few Days

Written by- Dr. S.M. Tarique Najeeb

The fastest way to get used to new hearing aids is to wear them consistently every day, practice listening in different environments, and gradually increase usage while learning the device’s key functions like volume control, noise filtering, and Bluetooth connectivity. It’s also important to give your brain time to adjust to the new sounds and the physical sensation of wearing the device.

Over 430 million people worldwide live with hearing loss, and studies show that consistent hearing aid use can improve communication and quality of life by up to 30%. For those with long-term hearing loss, the brain may need extra time to relearn how to process sound, so starting with short, regular listening sessions and gradually increasing them helps. Following these steps allows users to enjoy clearer sounds, better speech understanding, and a more active lifestyle.

SoundX visited an old age home to bring the gift of hearing to seniors, helping them reconnect with their loved ones and the world around them.”

Practice these techniques to make your hearing aids feel natural quickly:

1. Wear Them a Little at First
If this is your first hearing aid, don’t wear it all day right away. Start with a few hours at a time—around 8 hours or less—and slowly increase the time each day. The more you wear it, the better your brain becomes at understanding different sounds. But go slow and give yourself time to adjust.

2. Start in a Quiet Place
For the first few weeks, use your hearing aid in calm, quiet places. This helps your brain recognize sounds better. Once your brain gets used to hearing in quiet places, it will be easier to handle noisy places like restaurants or shopping malls.

3. Practice Listening Exercises
Spend some time each day listening to small sounds around you. Sit in a quiet room and notice things like a bird chirping, a clock ticking, or your own voice. Try reading out loud so your brain can connect words with the sounds you hear. You can also practice figuring out where sounds are coming from.

4. Check In with Your Audiologist
Visit your hearing doctor one or two weeks after getting your hearing aid. They can adjust the device to make sounds clearer, improve the fit, or answer any questions you have. Regular check-ins help you get the best results.

5. Join Hearing Aid Classes
If you can, join online or in-person classes for new hearing aid users. These classes teach useful tips, answer questions, and let you learn from other people who wear hearing aids.

6. Watch TV with Subtitles
If you’ve had hearing loss for a long time, your brain may need practice connecting sounds with words. Turn on subtitles when watching TV or movies. Reading the words while listening helps your brain understand speech more easily.

Achieving Success with Your Hearing Aid

Using a hearing aid successfully takes time, patience, and practice. Here are some important tips to help you get the most out of your device.

1. Be Patient and Stay Positive
It’s normal if your new hearing aid feels strange at first. Don’t get frustrated if you can’t adjust in the first few days. Be patient and keep a positive attitude. The more you focus on improving your hearing, the easier it will become to adapt. If you stick with it through the first few weeks, you’ll see much better long-term results.

2. Have Realistic Expectations
Hearing aids improve your hearing, but they don’t make it perfect. Don’t expect to hear everything clearly right away. Instead, focus on small improvements every day. Celebrate the progress you make, even if it’s just noticing sounds you hadn’t heard before.

3. Learn About Your Hearing
Understanding your hearing loss helps you use your hearing aid better. Read about your condition, learn how hearing aids work, and know what features might help you most. Being informed will make it easier to manage your hearing loss successfully.

4. Practice Every Day
Wear your hearing aid regularly and practice listening exercises daily. Start in quiet places, then move to slightly noisier environments. Over time, your brain will get used to different sounds, and listening will feel automatic. Try to wear your hearing aid during most of your waking hours as you get more comfortable.

Complete Guide to Adjusting to New Hearing Aids

Adjustment MethodTime FrameStarting PointDaily DurationKey ActionsBenefitsSuccess TipsExpected ResultsDifficulty LevelProfessional Support
Gradual Wearing ScheduleFirst 2-4 weeksAny comfortable settingStart 8 hours or less, increase dailyWear device consistently but not all day initially, slowly extend wearing time each dayBrain adapts without overwhelm, builds tolerance naturallyDon’t rush – increase by 1-2 hours every few days, listen to your bodyBetter long-term comfort and sound recognitionEasyMinimal – audiologist guidance helpful
Quiet Environment PracticeFirst 2-3 weeksCalm quiet places like home or libraryMultiple hours daily in peaceful settingsUse device only in quiet spaces before introducing noiseBrain learns to recognize individual sounds clearly firstStay in quiet rooms, avoid restaurants and malls initiallyEasier transition to complex noisy environments laterEasyNone required
Daily Listening ExercisesThroughout adjustment (ongoing)Quiet room at home15-30 minutes per dayFocus on small sounds – birds chirping, clock ticking, your own voiceImproves sound identification and spatial awarenessPractice locating where sounds come from, notice quiet detailsEnhanced ability to identify and locate sound sourcesModerateOptional – classes can help
Read Aloud PracticeFirst 4 weeks dailyAny quiet space10-20 minutes per sessionRead books, articles, or news out loud while wearing deviceConnects words with sounds heard through hearing aidChoose interesting material, speak at normal volumeBetter word-sound association and speech clarityEasyNone required
TV Subtitle TrainingFirst 4-6 weeks (critical for long-term hearing loss)Home entertainment areaDuring all TV and movie viewingAlways turn on subtitles while watching any contentBrain reconnects sounds with visual words, faster comprehensionWatch familiar shows first, read and listen simultaneouslyDramatically improved speech understandingEasyNone required
Audiologist Follow-upsWeek 1-2, then regularly as neededAudiology clinic or office30-60 minutes per appointmentProfessional device adjustments, fit optimization, ask questionsCustomized settings for optimal clarity and comfortBring written list of concerns, be specific about issuesPerfect device tuning and troubleshootingEasyEssential – required
Support Groups and ClassesOngoing throughout processOnline platforms or in-person venues1-2 hours weekly or monthlyJoin hearing aid user communities, attend workshopsLearn from experienced users, get practical tips and emotional supportAsk questions freely, share your experiences with othersFaster problem-solving and reduced frustrationEasyOptional but recommended
Patient Positive MindsetEntire adjustment period (3+ months)Daily mental practiceOngoing every dayStay positive, don’t get frustrated, focus on small improvementsReduces stress, prevents device abandonmentRemind yourself adjustment is normal and takes timeHigher success rate and continued device useModerateOptional counseling if struggling
Realistic Expectations SettingBefore and during adjustmentInitial consultationDaily mindset checkUnderstand hearing aids improve but don’t perfect hearingPrevents disappointment, maintains motivationCelebrate small wins like hearing new soundsSustained long-term satisfaction with deviceEasyAudiologist sets expectations
Educational LearningFirst 2-4 weeks intensivelySelf-study at home2-3 hours initially, ongoingRead about hearing loss, learn device features and functionsEmpowered self-management, better troubleshootingFocus on key features first – volume, programs, cleaningConfident independent device useModerateOptional resources provided
Progressive Environment ExposureWeeks 1-8 gradual progressionQuiet home → moderate → noisy publicIncrease complexity weeklyWeek 1-2 quiet, Week 3-4 moderate noise, Week 5+ restaurants/mallsBuilds real-world confidence in all situationsRetreat to quiet if overwhelmed, use noise filtersComfortable hearing in challenging environmentsModerate to DifficultAudiologist adjustments help
Consistent Daily PracticeMinimum 8-12 weeks for full adjustmentMorning routine integrationGradually increase from 8 to 14-16 hours dailyWear device during all waking hours as comfort increasesCreates automatic listening habits, maximum benefitSet phone reminders, make it part of morning routineDevice becomes second nature, worn without thinkingModerateMinimal after initial setup

Critical Success Factors: Wear consistently every day | Start in quiet environments | Increase time gradually | Practice listening exercises | Schedule audiologist follow-ups within 1-2 weeks | Use subtitles for speech training | Join support communities | Stay patient and positive | Set realistic expectations | Learn device features thoroughly

Timeline Summary: Days 1-7 (device feels strange, 4-8 hours daily) → Weeks 2-3 (getting comfortable, 8-10 hours daily) → Week 4 (feels natural, 10-12 hours daily) → Weeks 5-8 (well-adjusted, 12-16 hours daily) → Month 3+ (fully adapted, automatic use all day)

Remember: Adjusting to a hearing aid takes time, patience, and practice. Don’t hesitate to ask your  hearing care professional for help if you face any issues. Once you get used to your device, it can make a big difference in your daily life, helping you communicate better and enjoy sounds around you.

Final Note:
Getting used to your new hearing aid takes time, but it’s worth it. Be patient, practice every day, and follow your audiologist’s advice. Soon, hearing will feel natural again, and you’ll enjoy every sound around you.

If you need help choosing or adjusting your hearing aid, visit SoundX. They make hearing easy and comfortable with modern hearing aids and caring support.

FAQ

1. How long does it take to get used to hearing aids?
Most people start feeling comfortable with their hearing aids in about 3 to 8 weeks. The more you wear them, the faster your brain adjusts to new sounds.

2. Should I wear my hearing aids all day right away?
No. Start by wearing them for a few hours each day, then slowly increase the time. This helps your ears and brain get used to hearing again.

3. Why should I begin in quiet places?
Quiet places help your brain learn to recognize sounds clearly without too much noise. Once you’re comfortable, you can start using them in louder places.

4. What are listening exercises?
Listening exercises mean practicing small things like hearing birds chirp, a clock tick, or reading out loud. These help your brain understand and locate sounds better.

5. Why should I visit my audiologist after getting hearing aids?
Your audiologist can check if your hearing aids fit well and adjust the settings so you hear more clearly. They can also answer any questions you have.

6. How do subtitles help with hearing?
Watching TV or movies with subtitles helps your brain connect words with sounds again. It makes it easier to understand people when they talk.

7. What if my hearing aids feel uncomfortable?
It’s normal for new hearing aids to feel strange at first. If they hurt or feel too tight, tell your audiologist so they can fix the fit.

8. What’s the most important thing to remember when using hearing aids?
Be patient and positive! Getting used to hearing aids takes time, but if you wear them every day and practice listening, they’ll soon feel natural.

Dr S.M. Tarique Audiologist says:

Hearing loss is easier to fix when you catch it early. Most people wait too long and make it harder to recover clarity.

Visit Profile- Dr. S.M. Tarique Najeeb

What are the different types of hearing aids?

Written by- Dr. S.M. Tarique Najeeb

Medical Disclaimer:

This content is for educational purposes only and does not replace professional medical advice. Always consult a qualified audiologist before choosing a hearing aid.

There are mainly two main types of hearing aids — In-the-Ear (ITE) and Behind-the-Ear (BTE).
These two types come in many small designs to fit different ears and lifestyles.

According to the World Health Organization (WHO), more than 430 million people around the world live with hearing loss. Many of them use hearing aids to hear clearly, enjoy conversations, and live better lives.
Buying a new hearing aid can be confusing because there are so many shapes, sizes, and features. But don’t worry — let’s understand them in a simple way.

In-the-Ear (ITE) Hearing Aids

ITE hearing aids fit inside your ear. They are made just for your ear shape, so they feel comfortable.
All the small parts — like the microphone and speaker — are placed inside a tiny shell that fits in your outer ear.
ITE hearing aids are good for mild to severe hearing loss and may include special features like telecoils (which help you hear better in noisy places) and directional microphones (which focus on sounds coming from in front of you).

Common types of ITE hearing aids include:

  • Invisible-in-Canal (IIC)
  • Completely-in-Canal (CIC)
  • In-the-Canal (ITC)
  • Low-profile models
Type of hearing aids

Now, let’s understand each one simply

1. Invisible-in-Canal (IIC):
IIC hearing aids are the smallest type and fit deep inside the ear canal, making them almost invisible. They are very comfortable and make sounds feel natural, but they need careful cleaning and are best for people with mild to moderate hearing loss and wide ear canals.

2. Completely-in-Canal (CIC):
CIC hearing aids are slightly bigger than IICs and sit a little higher in the ear canal. They are still mostly hidden, easier to handle, and better at reducing wind noise, making them suitable for people who want a small but durable device.

3. In-the-Canal (ITC):
ITC hearing aids sit partly in the ear canal and partly in the outer ear. They are larger, so they can have extra features like longer battery life and directional microphones. They are easier to use than smaller types but might sometimes feel like the ear is slightly plugged.

4. Low-Profile Models:
Low-profile hearing aids are the largest ITE type, filling half or the entire outer ear. They can include many extra features and are very comfortable to wear. The only downside is that they are more visible, but they are easy to handle and adjust, making them ideal for people with moderate to severe hearing loss.

Behind-the-Ear (BTE) Hearing Aids

BTE hearing aids sit behind your ear. A small plastic tube connects the device to an ear mold that fits inside your ear.
They are the most common type and can help with all levels of hearing loss — from mild to severe.

Good things about BTEs:

  • Strong and easy to handle.
  • Long battery life and more features.
  • Great for both children and adults.

Fact: BTE hearing aids are used by nearly 70% of hearing aid users worldwide because they are reliable and fit most people comfortably.

Who Should Choose Which Hearing Aid?

Add 5–6 simple bullets:

  • IIC → people wanting invisible hearing aids
  • CIC → discreet but easier handling
  • ITC → balance of features & size
  • Low-profile ITE → seniors & severe loss
  • BTE → children, elderly, all hearing loss

This boosts:

  • Featured snippet chances
  • Conversion intent
  • Time on page

Types of Hearing Aids – Complete Comparison Guide

Hearing Aid TypeMain CategorySize & VisibilityPlacement LocationBest For (Hearing Loss Level)Key FeaturesAdvantagesDisadvantagesBattery LifeIdeal User ProfileEase of HandlingSpecial Requirements
Invisible-in-Canal (IIC)In-the-Ear (ITE)Smallest – Almost completely invisibleDeep inside ear canalMild to moderate hearing lossCustom-fitted shell, natural sound quality, discreet designNearly invisible, very comfortable, natural sound feel, cosmetically appealingRequires careful cleaning, needs wide ear canals, limited features, can be difficult to handleShort (small batteries)People wanting maximum discretion with mild hearing loss and wide ear canalsDifficult – small size makes insertion/removal challengingWide ear canals required, regular professional cleaning needed
Completely-in-Canal (CIC)In-the-Ear (ITE)Very small – Mostly hiddenSits higher in ear canal than IICMild to moderate hearing lossCustom-molded, better wind noise reduction, slightly larger than IICMostly hidden, easier to handle than IIC, good wind noise reduction, durableStill small and requires care, limited battery capacity, fewer features than larger modelsShort to moderateActive individuals who want discreet devices but need easier handling than IICModerate – slightly easier than IIC but still requires dexterityManual dexterity needed, regular cleaning required
In-the-Canal (ITC)In-the-Ear (ITE)Medium – Partly visiblePartly in ear canal, partly in outer earMild to moderate hearing lossDirectional microphones, longer battery life, more features than smaller ITEsEasier to use and handle, better features, longer battery, good balance of size and functionPartially visible, may cause plugged ear sensationModeratePeople who want balance between discretion and functionalityEasy – larger size aids handlingNone specific, suitable for most users
Low-Profile (Full Shell/Half Shell)In-the-Ear (ITE)Largest ITE – Most visibleFills half or entire outer ear bowlModerate to severe hearing lossMaximum features (telecoils, volume controls, Bluetooth), very comfortable, powerful amplificationMany advanced features, very comfortable, easy to handle and adjust, powerful soundMost visible ITE type, larger physical presenceLong (larger batteries)People with moderate to severe hearing loss who prioritize features and ease of use over discretionVery easy – large enough for easy manipulationNone – most accessible ITE option
Behind-the-Ear (BTE)Behind-the-Ear (BTE)Visible – Sits behind earBehind ear with tube connecting to ear mold inside earMild to severe hearing loss (all levels)Robust construction, maximum features, long battery life, directional microphones, telecoils, BluetoothStrong and durable, easy to handle, longest battery life, most features available, suitable for children and adults, fits most ear shapesVisible design, tube may be noticeable, can interfere with glassesVery long (largest batteries)Anyone with any level of hearing loss, especially children, elderly, or those needing maximum features and durabilityVery easy – largest size makes all adjustments simpleEar mold fitting required, may need adjustments with glasses

Global Impact: Over 430 million people worldwide live with hearing loss (WHO). Nearly 70% of hearing aid users choose BTE models due to reliability and comfort.

Professional Recommendation: Consult hearing care professionals for hearing tests and personalized fitting to ensure optimal comfort and performance for your specific needs and lifestyle.

Why the Right Fit Matters

When choosing a hearing aid, it’s not just about how bad your hearing is. You also need to think about your lifestyle. For example, do you play sports or spend most of your time indoors? Do you want your hearing aid to be hidden, or is it okay if people can see it?

Knowing the good and bad points of each type of hearing aid can help you pick the one that works best for you. A hearing expert can guide you, but it’s helpful to know all the options before making a choice.

If you are looking for professional hearing aid consultation and fitting, you can visit SoundX Lucknow

Final Thoughts

Whether you are using a hearing aid for the first time or replacing an old one, knowing about different types helps you choose wisely.
If you’re still unsure, visit SoundX Hearing Solutions. Their professionals can test your hearing and help you pick a hearing aid that fits your ear perfectly and makes your daily life easier.

FAQ

1. What is a hearing aid?
A hearing aid is a small device that makes sounds louder so people with hearing loss can hear better. It helps you understand conversations and enjoy everyday sounds.

2. What are the main types of hearing aids?
The two main types are In-the-Ear (ITE) and Behind-the-Ear (BTE). Each type comes in different sizes and styles to fit different ears and lifestyles.

3. Who can use ITE hearing aids?
ITE hearing aids fit inside the ear and are suitable for people with mild to severe hearing loss. They are comfortable, custom-made, and mostly hidden from view.

4. What is the smallest hearing aid?
Invisible-in-Canal (IIC) hearing aids are the tiniest and almost invisible. They fit deep in the ear canal and feel natural, but need careful cleaning.

5. Why are BTE hearing aids so popular?
BTE hearing aids sit behind the ear and are easy to handle. They work for all levels of hearing loss and have long battery life with many features.

6. Can children use hearing aids?
Yes, children can use both ITE and BTE hearing aids. Professionals adjust them to fit tiny ears safely and comfortably.

7. How do I know which hearing aid is right for me?
It depends on your hearing loss, ear shape, and lifestyle. A hearing expert can test your ears and help you choose the best one.

8. Do I need to clean my hearing aids?
Yes, cleaning your hearing aids regularly keeps them working well. Proper care also prevents damage from earwax or moisture.

Dr S.M. Tarique Audiologist says:

Step away from the cotton buds! Most ear-cleaning mistakes do more harm than good.

Visit Profile- Dr. S.M. Tarique Najeeb

How to Wear and Use SoundX Hearing Aids for Clearer Hearing

Written by- Mr Shivam Singh

This guide will help you learn how to set up, use, and take care of your SoundX hearing aids. It will show you easy steps so you can hear better and keep your hearing aids working well every day.

“SoundX proudly participates in ISHACON 2025, Patna, Bihar — one of India’s largest and most respected audiology conferences!”

What Are the Main Parts of SoundX Hearing Aids and How They Work?

  1. Microphone: The microphone on your hearing aids captures sound from your environment, allowing you to hear conversations, music, and other sounds with clarity.
  2. Multi-function Button 1: This button serves multiple purposes. You can adjust the volume of your hearing aids using Button 1. Additionally, pressing and holding Button 1 for a few seconds turns the hearing aids on or off.
  3. Multi-function Button 2: Button 2 also offers versatility. It allows you to decrease the volume of your hearing aids and switch between different hearing programs. Press and hold Button 2 to activate these functions.
  4. Ear Tube: The ear tube is a crucial component that connects the eartip to the main body of the hearing aid. It ensures a secure and comfortable fit within your ear canal.
  5. Stabilization Bar: To prevent the eartip from moving out of place, the stabilization bar provides stability and comfort throughout the day.
  6. Eartip: Made of soft silicone, the eartip holds the hearing aid securely in your ear canal. It’s essential for comfort and proper functionality. It is available in multiple sizes and can be replaced depending on the size of your ear canal. It is also available in perforated and closed styles, which can be used as per the recommendation of your SoundX audiologist.
  7. Charging Contact: These contacts allow for easy charging of your hearing aids. Simply place them in the charging case, and they’ll begin charging automatically.
  8. Charging Case: A portable charging case included for convenient recharge-ability of your hearing aids on the go. One full charge will provide up to 18 hours of enhanced hearing.

Charging Case

Your charging case is an essential accessory for storing and charging your hearing aids:

  1. Charging Slots: The charging case features dedicated slots for each hearing aid, ensuring they receive the power they need to function optimally.
  2. Indicator Lights: LED lights on the charging case provide visual feedback on the charging status of your hearing aids and the case itself. This allows you to monitor the charging progress conveniently.
  3. Charging Port: Connect the charging case to a power source using the included USB cable. This ensures that your hearing aids are always ready for use whenever you need them.

Accessories

The product comes with the below listed accessories.

ItemsDescription
Eartip × 10To hold the hearing aid comfortably and securely in the ear canal
USB Cable x 1Used to charge the charging case
Cleaning Tool × 1Used to clean hearing aids and charging case
Manual x 1Used for users to read and understand how to use hearing aids and other objects

Using Your SoundX Hearing Aids: Simple Steps to Get Started

Fitting Eartips

  1. Selecting Eartips: Choose the eartip size that provides the most comfortable and secure fit for your ears. It’s essential to experiment with different sizes to find the perfect fit.
  2. Attaching Eartips: Once you’ve selected the appropriate eartip size, attach it securely to the ear tube. Ensure that the eartip is pushed firmly onto the ear tube to prevent it from coming loose.

Ear Tube Replacement

  1. Removing Ear Tubes: To replace the ear tubes, gently rotate them and pull them out of the hearing aids. Take care not to apply too much force to avoid damaging the devices.
  2. Inserting New Ear Tubes: When inserting new ear tubes, align them with the corresponding slots on the hearing aids and gently push them into place until they’re securely seated.

Power On/Off

  • Turning On: To power on your hearing aids, press and hold Button 1 for approximately three seconds. You’ll hear a notification sound indicating that the devices are now powered on and ready to use.
  • Turning Off: Similarly, to power off your hearing aids, press and hold Button 2 for about three seconds. You’ll hear a notification sound confirming that the devices have been powered off.

Wearing/Removing Hearing Aids

  • Wearing Hearing Aids: Insert the hearing aids gently into your ear canal, ensuring that the eartips are securely seated. Once in place, the devices should feel comfortable and snug.
  • Removing Hearing Aids: To remove the hearing aids, gently pull them out of your ear canal while holding onto the stabilization bar. Take care not to apply excessive force to avoid discomfort.

Volume Control

  • Adjust the volume of your hearing aids using the multi-function buttons. Each press of Button 1 or Button 2 will increase or decrease the volume, respectively.
  • You’ll hear a “Beep” sound each time you adjust the volume, allowing you to gauge the changes in volume levels.

Programs Switching

  • Your hearing aids come with multiple preset programs designed to enhance your listening experience in different environments.
  • If you want to understand your hearing profile better before programming your hearing aids, you can take a hearing test and learn how to read an audiogram.

Specific programs are associated with different prompt tones as mentioned in the table below:

Hearing ProgramPrompt Tone
1Program 1beep
2Program 2beep beep
3Program 3beep beep beep
4Program 4beep beep beep beep

Bluetooth Connectivity

  • Bluetooth technology allows you to connect your hearing aids to compatible devices such as smartphones, tablets, and computers.
  • To initiate a Bluetooth connection, ensure that Bluetooth is enabled on your device and follow the pairing instructions provided in your device’s user manual.

SoundX App

  • The SoundX app provides additional functionality and customization options for your hearing aids. Download the app to your smartphone and follow the on-screen instructions to set up your devices.
  • With the SoundX app, you can:
    • Adjust volume levels
    • Switch between hearing programs to suit your environment
    • Explore our best hearing aids to choose one that fits your lifestyle
    • Learn about hearing loss via blogs and educational videos
    • Contact SoundX expert audiologists
    • Take a hearing test and program your hearing aids according to your hearing loss profile

Charging Your Devices

Charging Hearing Aids

  1. Placing in Charging Case: When it’s time to charge your hearing aids, simply place them in the designated slots within the charging case. Ensure that they’re properly aligned to facilitate charging.
  2. Monitoring Charging Status: LED indicator lights on the charging case will illuminate to indicate that the devices are charging. A blue light indicates that charging is in progress, while a white light indicates that the devices are fully charged.

Charging the Charging Case

  1. Connecting USB Cable: Use the included USB cable to connect the charging port of the case to a power source, such as a computer or wall adapter.
  2. Monitoring Battery Capacity: LED lights on the charging case will provide real-time feedback on the remaining battery capacity, allowing you to plan your charging schedule accordingly.

Device Care Tips

  • Handle your hearing aids with care to avoid drops or impacts that could damage the devices.
  • Refrain from using sharp objects to clean earwax, as this could cause damage to the eartips and ear tubes.
  • Store your hearing aids in a cool, dry place away from moisture and extreme temperatures to prevent damage.
  • Remove your hearing aids before swimming, showering, or engaging in activities that expose them to water.
  • Regularly inspect and clean your devices to remove debris and maintain optimal performance.
  • Replace eartips every few months to ensure a secure and comfortable fit, and consider replacing ear tubes if they show signs of wear or damage.

This comprehensive user manual provides detailed instructions on using and caring for your SoundX hearing aids. If you have any questions or encounter any issues, don’t hesitate to consult this guide for assistance.

FAQ

1. How do I turn my SoundX hearing aids on and off?
To turn them on, press and hold Button 1 for about 3 seconds until you hear a sound. To turn them off, press and hold Button 2 for 3 seconds.

2. How long do my SoundX hearing aids last after a full charge?
When fully charged, your hearing aids can work for up to 18 hours. Always charge them overnight or when the battery gets low.

3. How do I charge my SoundX hearing aids?
Place them in the charging case. The blue light means they’re charging, and the white light means they’re fully charged.

4. Can I connect my SoundX hearing aids to my phone?
Yes! Your hearing aids have Bluetooth. Just turn on Bluetooth on your phone and follow the pairing steps shown on your phone’s screen.

5. What is the SoundX app for?
The SoundX app helps you control your hearing aids easily. You can adjust the volume, switch programs, take hearing tests, and even talk to an audiologist through the app.

6. How do I clean my hearing aids?
Use the cleaning tool that comes in the box. Gently remove dirt or earwax. Don’t use sharp objects or water to clean them.

7. How do I know which eartip size is right for me?
Try a few sizes to see which one feels most comfortable and fits securely. Your SoundX audiologist can also help you choose the right size.

8. What should I do if my hearing aids stop working?
First, check if they are charged and turned on. If they still don’t work, make sure there’s no dirt blocking the eartip. If the problem continues, contact SoundX support for help.

Mr Shivam Singh Audiologist says:

Not all hearing loss needs surgery . In fact most cases can be managed with modern hearing aids. But in some structural or medical cases, surgery can help.

Hearing Aids vs PSAPs: Key Differences You Need to Know

Written by- Dr. S.M. Tarique Najeeb

Both PSAPs (personal sound amplifiers) and hearing aids help people hear better, but they are not the same. Many people don’t know the main differences between them.PSAPs can be bought from a store without seeing a doctor, but using them without knowing how they work can sometimes cause problems.

Studies show that hearing aids help people understand speech about 30–40% better than PSAPs, especially in noisy places. The FDA checks hearing aids to make sure they are safe and work properly, which is why doctors usually prescribe them.

Experts say that hearing aids work much better than PSAPs for understanding speech, especially in noisy places. The FDA checks hearing aids to make sure they are safe and effective, which is why doctors usually prescribe them.

Let’s learn the basics of how hearing aids and PSAPs work so it’s easy to understand!

How do Hearing Aids Work?

A hearing aid is a special device that is approved and checked by the FDA. Usually, a doctor or audiologist gives it to someone who has trouble hearing. Since 2020, some hearing aids can also be bought over the counter because the rules changed.

A hearing aid has three main parts that help it work properly:

  1. Microphone: The sound enters the hearing aid through this component, which is then converted into electrical signals and sent to the amplifier.
  2. Amplifier: The amplifier enhances the magnitude of the sound received through the microphone.
  3. Speaker: The amplified sound is received/heard by the user through the speaker. 

Hearing aids are highly customized as per the patient’s needs and are well-fitted to an individual’s ear shape. Some of the hearing aids have advanced features, such as tinnitus control and Bluetooth connectivity. They also enable a person to selectively enhance certain sounds, as well as lessen any background or unwanted noise.

What is a PSAP hearing device?

PSAPs (personal sound amplifiers) are also called sound amplifiers or hearing aid amplifiers, but they are not approved by the FDA as medical devices. People usually use PSAPs for fun or recreational purposes, not because they have trouble hearing. PSAPs come in different shapes and designs, and some of them look a lot like hearing aids. Unlike hearing aids, PSAPs don’t focus on specific sounds — they make all sounds around you louder.

Now, let’s look at the main differences between a hearing aid and a PSAP:

FDA Regulation: 

A hearing aid is a special medical device that is approved and controlled by the FDA. You need a doctor’s prescription to get one. 

PSAPs, on the other hand, are not regulated by the FDA. You can buy them from a store without a doctor, and you don’t need any medical supervision to use them.

Cost: 

Hearing aids are expensive, costing between $2,000 and $4,000.  

PSAPs are much cheaper, usually between $50 and $400, which is why many people buy them. But using a PSAP without a doctor’s advice might harm your hearing instead of helping it.

Selective Sound Enhancement: 

PSAPs make all sounds louder, even the ones you don’t want to hear. 

Hearing aids are smarter. They filter out unwanted sounds and make the important sounds, like someone talking to you, louder. For example, in a noisy café, a hearing aid will help you hear your friend, while a PSAP will just make the noise louder and harder to listen.

Design: 

Most PSAPs have just a microphone, amplifier, and speaker. They are one size fits all and not customized. 

Hearing aids are custom-made by a doctor or audiologist to fit your ear and your hearing needs. They are comfortable, secure, and come with cool features like:

  • Rechargeable batteries
  • Directional microphones
  • Bluetooth connection
  • Tinnitus control

Some modern hearing aids can even be programmed remotely by a doctor, so you don’t have to go to the clinic every time changes are needed.

Why Using PSAPs Can Be Risky for Your Hearing

You might have come across cases wherein people have reported hearing damage after using PSAPs / hearing amplifiers. However, they are not at all dangerous if used after a proper hearing evaluation. Hearing damage usually happens when people try to substitute these devices for hearing aids, which can cause more harm than good. If used without medical supervision, PSAPs can cause temporary or permanent hearing loss in individuals.

Make sure that if you are facing any kind of hearing difficulties, you are getting it diagnosed immediately by a certified healthcare professional. The hearing loss can be assessed easily using an audiogram. Trying to find a solution through the use of a PSAP, not only keeps you from identifying the underlying cause of the issue but might completely damage your hearing abilities in the long run.

Risk of Using PSAPs

Hearing Aids vs PSAPs Comparison Table

FeatureHearing AidsPSAPs (Personal Sound Amplifiers)
FDA RegulationFDA-approved medical devices; require prescription (though some OTC options available since 2020)Not FDA-regulated; no prescription required
Primary PurposeMedical treatment for diagnosed hearing lossRecreational use for enhancing environmental sounds
Cost Range$2,000 – $4,000$50 – $400
Sound EnhancementSelective sound enhancement; filters unwanted noise and amplifies important sounds (e.g., speech)Amplifies all sounds equally, including background noise
CustomizationCustom-fitted to individual ear shape; programmed for specific hearing needsOne-size-fits-all; not personalized
ComponentsMicrophone, amplifier, speaker + advanced technologyBasic microphone, amplifier, and speaker only
Advanced FeaturesRechargeable batteries Directional microphones Bluetooth connectivity Tinnitus control Remote programming capabilityMinimal to no advanced features
Professional InvolvementFitted and programmed by audiologist or doctorSelf-purchased and used without medical supervision
Design & ComfortProfessionally fitted for comfort and securityGeneric fit; may not be comfortable for all users
Risk LevelSafe when properly prescribed and fittedCan cause temporary or permanent hearing damage if used without proper hearing evaluation
Best Used ForDiagnosed hearing loss requiring medical interventionTemporary sound enhancement in recreational settings (e.g., bird watching, theater)
Diagnosis RequirementRequires audiogram and professional hearing assessmentNo diagnosis or assessment needed (but recommended)

How to Choose between a PSAP and a Hearing Aid

Although the fundamental technologies being used in hearing aids and PSAPs are largely similar, these devices are used in completely different scenarios and serve a special hearing purpose. If you are interested in purchasing a PSAP or a hearing aid, you must choose the device carefully based on your specific requirements. If the primary objective is a recreational activity, such as birdwatching or performing on stage, you would want to look for a suitable good-quality PSAP. In addition, a PSAP must be also bought after undergoing a hearing evaluation. On the other hand, to resolve any hearing-related issues, you need to visit an audiologist or an ENT doctor, who can prescribe you a custom-tailored hearing aid. In addition to being customized as per a patient’s requirements, hearing aids are also equipped with additional features that make them highly user-friendly.

Final Note:
Hearing aids and PSAPs may look similar, but they are very different. Hearing aids are medical devices made to treat hearing loss safely, while PSAPs are just sound boosters for fun or short use. Using a PSAP instead of a hearing aid can sometimes make your hearing worse.If you have trouble hearing, always visit a hearing care professional. SoundX can help you get a proper hearing test and choose the right hearing aid made just for you — safe, comfortable, and clear.

If you’re in or around Noida or Gurgaon and want a professional hearing evaluation before choosing a hearing aid, you can visit SoundX Noida or SoundX Gurgaon. The clinic offers complete hearing tests, personalized device fitting, and guidance on whether a hearing aid or PSAP suits your needs best — all with the help of trained audiologists.

FAQ

1. What is the main difference between a hearing aid and a PSAP?
A hearing aid is a medical device for people with hearing loss and is usually prescribed by a doctor. A PSAP is mostly used for fun or temporary sound amplification and is not regulated by the FDA.

2. Can I buy a hearing aid without a doctor’s prescription?
Some hearing aids are now available over the counter, but most still require a doctor or audiologist to prescribe them. PSAPs, however, can be bought anywhere without a prescription.

3. Why are hearing aids more expensive than PSAPs?
Hearing aids cost between $2,000 and $4,000 because they are custom-made and come with advanced features. PSAPs are cheaper, usually $50 to $400, but they don’t offer medical benefits or customization.

4. Do PSAPs filter out unwanted background noise?
No. PSAPs make all sounds louder, including background noise. Hearing aids can filter out unwanted sounds and amplify only the important sounds, like someone talking.

5. Can PSAPs damage my hearing?
Yes, using a PSAP without a hearing evaluation or medical supervision can cause temporary or permanent hearing loss. Hearing aids are safe when prescribed and fitted by a professional.

6. What are the main parts of a hearing aid?
A hearing aid has three main parts: a microphone (to pick up sound), an amplifier (to make sound louder), and a speaker (to send the sound into your ear).

7. Can hearing aids be customized?
Yes! Hearing aids are custom-fitted to your ear and hearing needs. They can also have advanced features like rechargeable batteries, Bluetooth, tinnitus control, and remote programming.

8. How do I decide between a PSAP and a hearing aid?
If you need help with hearing loss, visit a doctor for a custom hearing aid. If you want temporary or recreational sound amplification, you can consider a PSAP, but it’s best to get a hearing check first.

Dr S.M. Tarique Audiologist says:

Don’t fall for the myths! Stay tuned to learn everything about ear care and protect your hearing health.

Visit Profile- Dr. S.M. Tarique Najeeb